
Your First Workspace
Get up and running with Workbench in a few simple steps.
1. Add a Repository
Section titled “1. Add a Repository”Launch Workbench and click + Add Repo in the sidebar. You have three options:
- Open existing — Select a local git repository already on your machine.
- Create new — Initialize a new repository in a chosen directory.
- Clone — Clone a repository by URL (SSH or HTTPS). Workbench runs
git cloneand streams progress in real time.
If you frequently add repositories from the same parent directory, set Settings > General > Default repository directory to pre-fill the path in the Open Existing and Create New tabs.
Welcome screen
Section titled “Welcome screen”After adding a repository, Workbench shows a project-scoped start page. This welcome screen displays recent commits on the default branch so you can see what has landed on main before deciding what to work on next.
2. Create a Workspace
Section titled “2. Create a Workspace”Click the + button next to your repository name in the sidebar to create a new workspace. Workbench will:
- Create a new git worktree (an isolated copy of your repo on its own branch)
- Start a fresh Claude Code agent session in that worktree
- Run your setup script if one is configured (e.g.,
bun install,pip install -r requirements.txt)
Workspace context menu
Section titled “Workspace context menu”Right-click any workspace row in the sidebar to access quick actions:
- Sync with Main — rebase or merge the workspace branch onto the latest trunk.
- Archive — archive the workspace when you are done with it.
- Open in editor — open the worktree in your configured editor.
- Other actions depending on workspace state (rename, copy branch name, etc.).
Workspace context and goals
Section titled “Workspace context and goals”Ad-hoc workspaces — those created without a linked issue or PR — can set a context description and goal from the workspace header. These fields help you track what the workspace is for and what you are trying to accomplish, especially when running several workspaces in parallel.
3. Send Your First Prompt
Section titled “3. Send Your First Prompt”Type a message in the chat panel and press Enter to send it to the agent. Claude Code will start working in the workspace’s isolated worktree.
Try something like:
“Add a health check endpoint at GET /health that returns a JSON response with status and timestamp.”
The agent will create or modify files, and you’ll see its progress streamed in real-time.
4. Review Changes
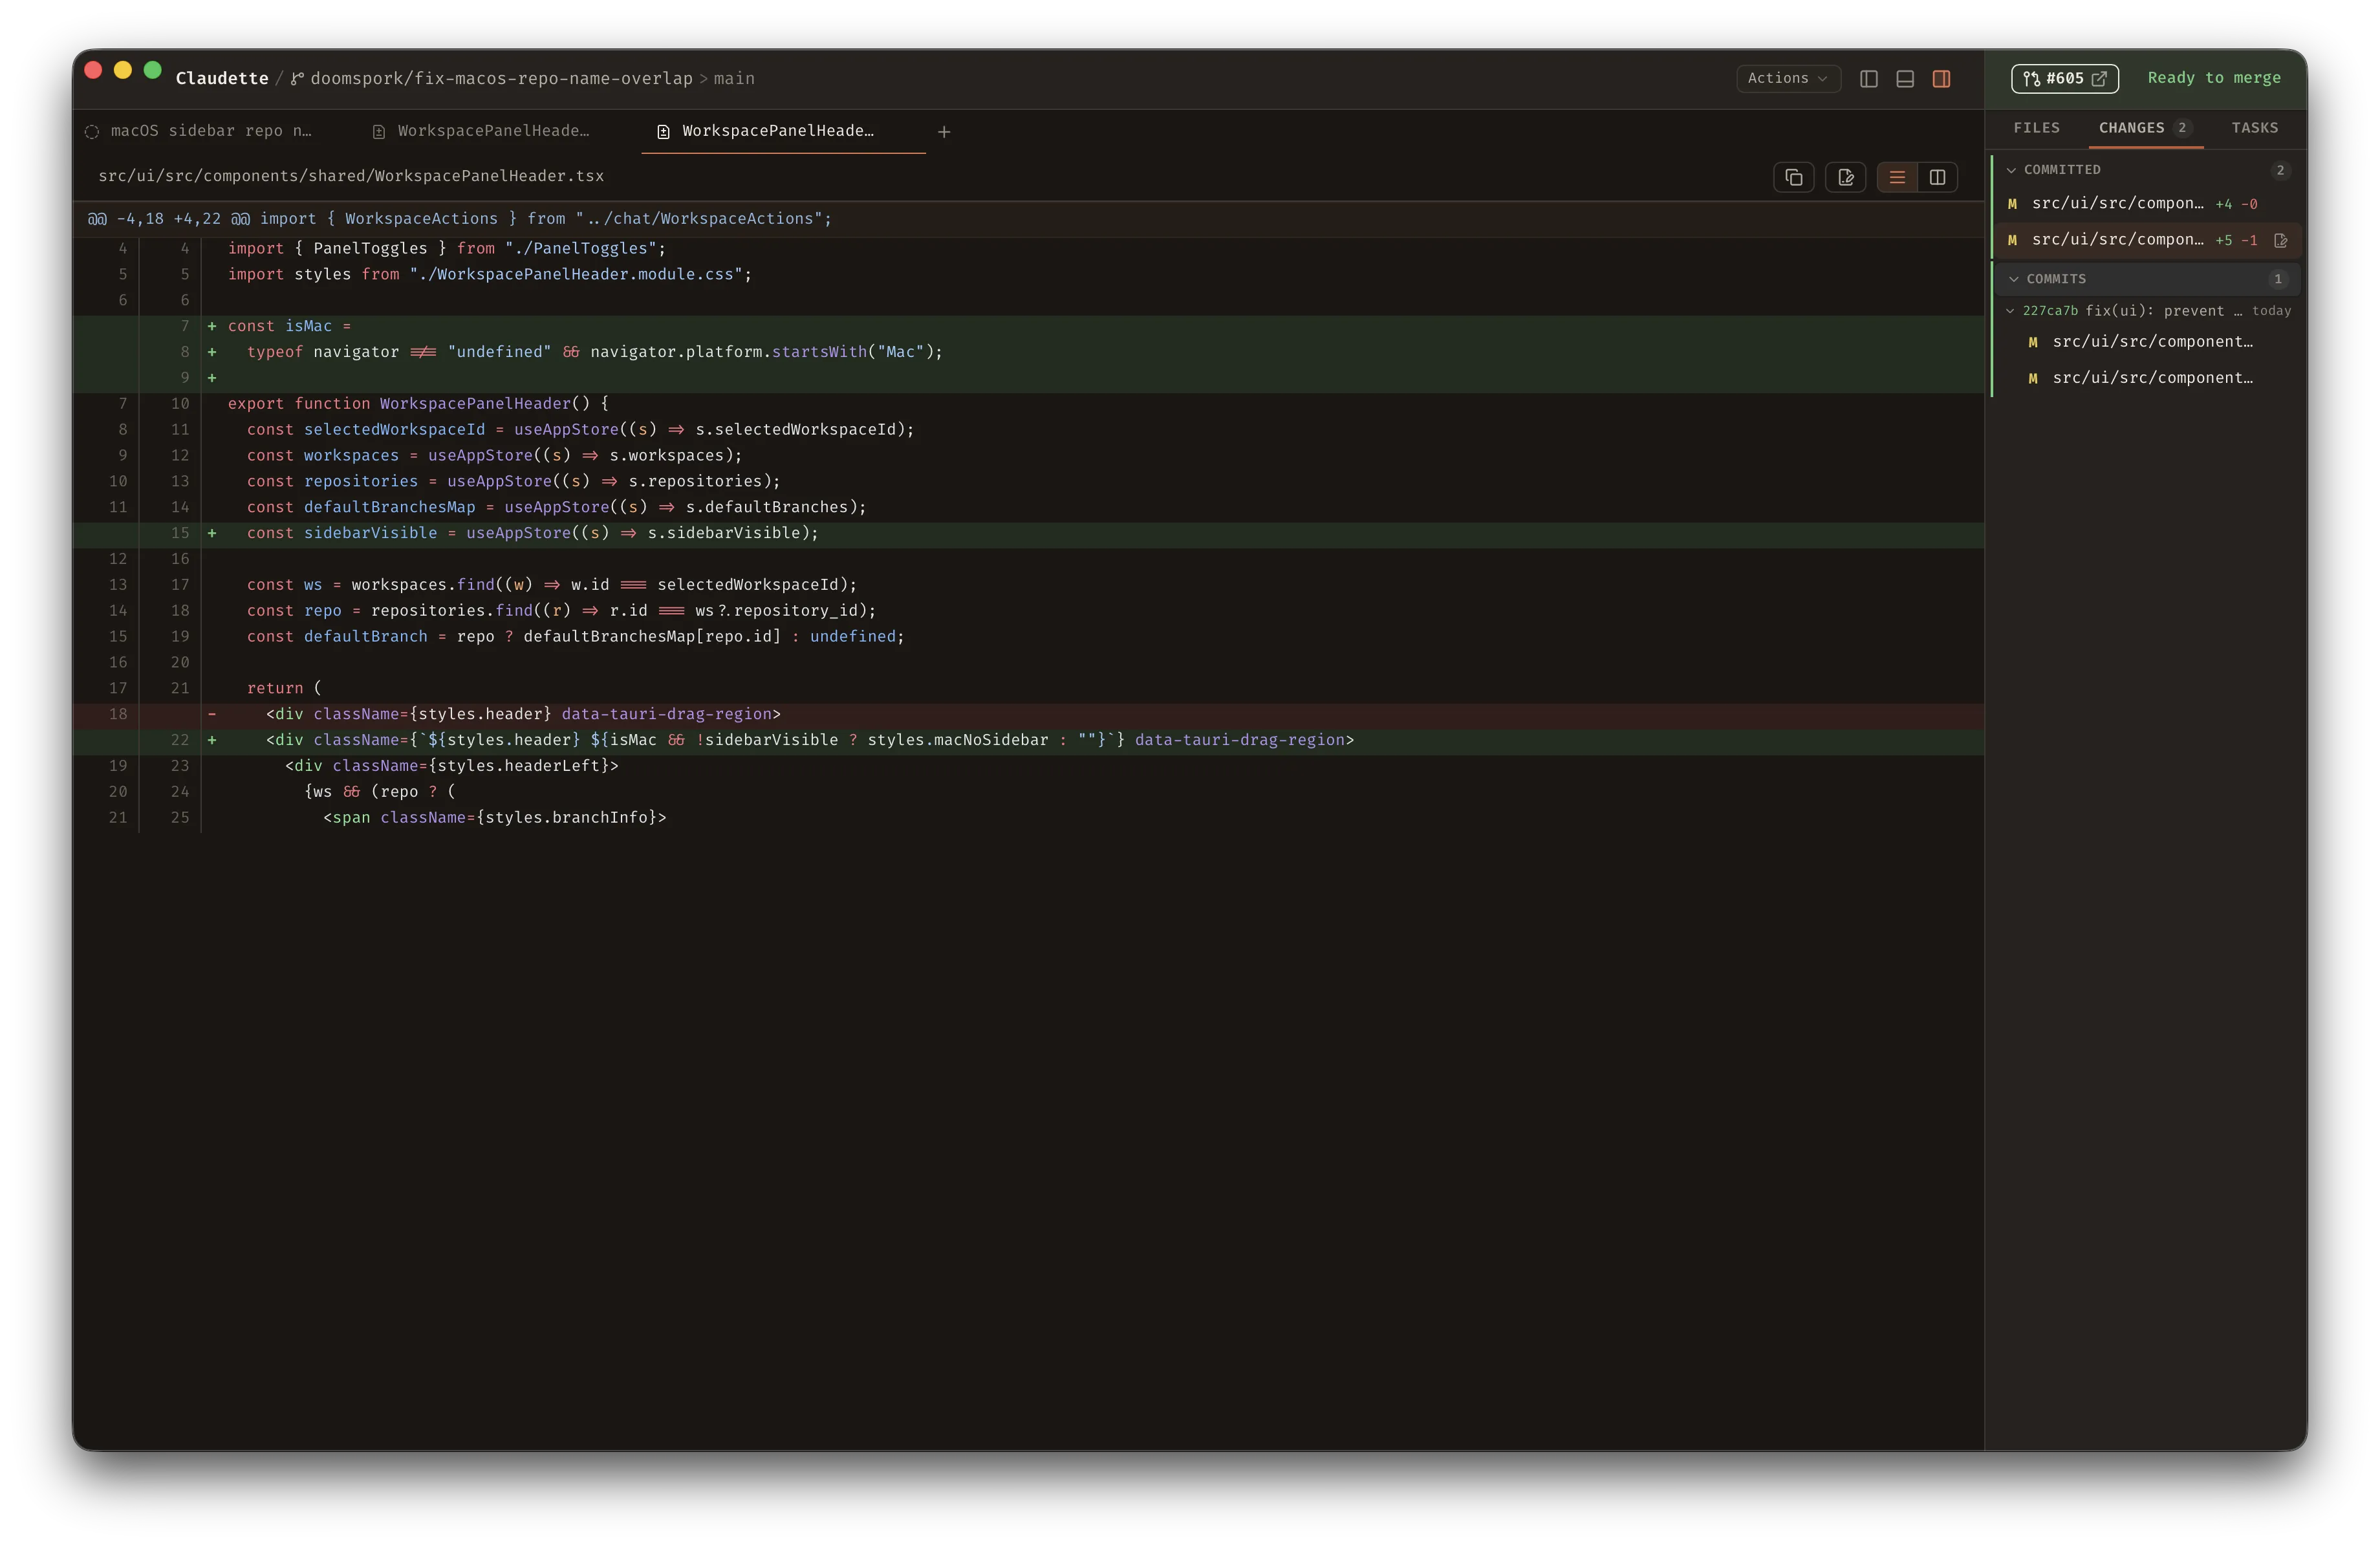
Section titled “4. Review Changes”Once the agent finishes, click on a workspace to view the diff panel showing all files that were changed. You can:
- Review each file’s changes in unified diff format
- See the list of changed files in the right sidebar
- Open the integrated terminal to test the changes
5. Iterate or Merge
Section titled “5. Iterate or Merge”From here you can:
- Send more prompts to refine the changes
- Open a terminal (
⌘/Ctrl + ``“) to test manually - Merge the worktree branch into your main branch when ready
Next Steps
Section titled “Next Steps”- Learn about the full workflow for using Workbench day-to-day
- Set up per-repo settings like custom instructions and setup scripts
- Explore parallel agents to work on multiple tasks at once
Original source: utensils.io/claudette